PREPARING PRINT FILES
Taking the time to prepare your files properly will streamline the production process and optimize print quality. Your print files need to match the technical specifications listed below. If you aren’t comfortable with all these technical terms, we’ll gladly prepare your files for you. Feel free to get in touch!
Nomenclature:
Here is the good way to name your files:
Fabric_quantity(in meters or number of copies)_file-name_file-size (in inches)
Examples: DBP_4x_Spring-leaves_59,06x24,61
Pop_5m_spring-sweetness_5x5
** DON'T put spaces but rather dashes.
File types: .jpg and .pdf (Adobe preset X-4:2008)
.jpg and .pdf (preferred formats), .tif, .eps, .png (also accepted)
* Make sure to have and include the colour profile
Image resolution: 150 DPI
Aim for a final format with a minimum resolution of 150 DPI (dots per inch)—below that, your image may turn out blurry. For best results, the resolution of your original image should always be good, as simply increasing it in Photoshop will not improve the image quality.
And to optimize quality, it’s best to work on your files in vector mode.
Colour space: CMYK or RGB
You can work in CMYK (Cyan-Magenta-Yellow-Black) or RGB (Red-Green-Blue) mode. However, you should be especially careful when working in RGB mode: as the colour spectrum is wider than the printer is capable of printing, you may find that the printout does not accurately reflect what you see on your screen. Fluorescent colours cannot be printed.
Working with Pantone colours is another possibility. However, since some of the pigments used to create these colours are not available in the printer’s inks, some colours are difficult or impossible to achieve. We therefore recommend that you convert your Pantone colours to CMYK in your document to get a more accurate print preview.
Shrinkage: 1% to 3%
The heat generated by the printing process can cause the fabric to shrink slightly. Depending on the fabric used, shrinkage can range from about 1% to 3%. If size accuracy is very important to you, we recommend that you make your image slightly larger.
Printing a repeating pattern
If you wish to print a repeating pattern, you need only provide one repetition in the actual size (100% of the target printed size). The printer software will take care of copying the image across the full width and length.
Bleed: 0.5 in.
When printing a banner or display material, the bleed is an overflow of the background image into the document. Allowing for a 0.5 in. bleed on each side of the document avoids white margins appearing when the materials are cut.
Typography
Ideally, you should vectorize (create outlines of) the fonts used in your document. You are also welcome to provide your fonts (Mac) in a clearly identified folder.
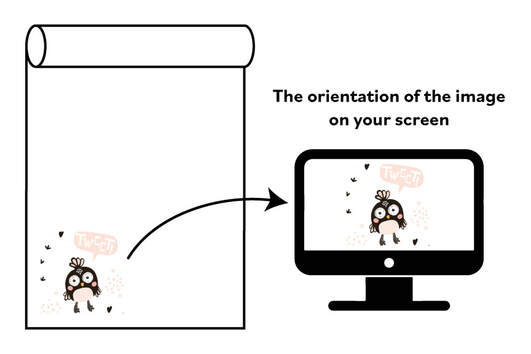
Images
You can include your images directly in your document or attach them in a clearly identified folder.
Please make sure that your image is in the orientation that you wish to print it. (See image below)
Here is the good way to name your files:
Fabric_quantity(in meters or number of copies)_file-name_file-size (in inches)
Examples: DBP_4x_Spring-leaves_59,06x24,61
Pop_5m_spring-sweetness_5x5
** DON'T put spaces but rather dashes.
File types: .jpg and .pdf (Adobe preset X-4:2008)
.jpg and .pdf (preferred formats), .tif, .eps, .png (also accepted)
* Make sure to have and include the colour profile
Image resolution: 150 DPI
Aim for a final format with a minimum resolution of 150 DPI (dots per inch)—below that, your image may turn out blurry. For best results, the resolution of your original image should always be good, as simply increasing it in Photoshop will not improve the image quality.
And to optimize quality, it’s best to work on your files in vector mode.
Colour space: CMYK or RGB
You can work in CMYK (Cyan-Magenta-Yellow-Black) or RGB (Red-Green-Blue) mode. However, you should be especially careful when working in RGB mode: as the colour spectrum is wider than the printer is capable of printing, you may find that the printout does not accurately reflect what you see on your screen. Fluorescent colours cannot be printed.
Working with Pantone colours is another possibility. However, since some of the pigments used to create these colours are not available in the printer’s inks, some colours are difficult or impossible to achieve. We therefore recommend that you convert your Pantone colours to CMYK in your document to get a more accurate print preview.
Shrinkage: 1% to 3%
The heat generated by the printing process can cause the fabric to shrink slightly. Depending on the fabric used, shrinkage can range from about 1% to 3%. If size accuracy is very important to you, we recommend that you make your image slightly larger.
Printing a repeating pattern
If you wish to print a repeating pattern, you need only provide one repetition in the actual size (100% of the target printed size). The printer software will take care of copying the image across the full width and length.
Bleed: 0.5 in.
When printing a banner or display material, the bleed is an overflow of the background image into the document. Allowing for a 0.5 in. bleed on each side of the document avoids white margins appearing when the materials are cut.
Typography
Ideally, you should vectorize (create outlines of) the fonts used in your document. You are also welcome to provide your fonts (Mac) in a clearly identified folder.
Images
You can include your images directly in your document or attach them in a clearly identified folder.
Please make sure that your image is in the orientation that you wish to print it. (See image below)
UPLOADING FILES
|
|
If you have any questions about how to prepare your files, we’ll be happy to help you. Just give us a call